29 May 2014

Plaid(ish) Placemat Tutorial

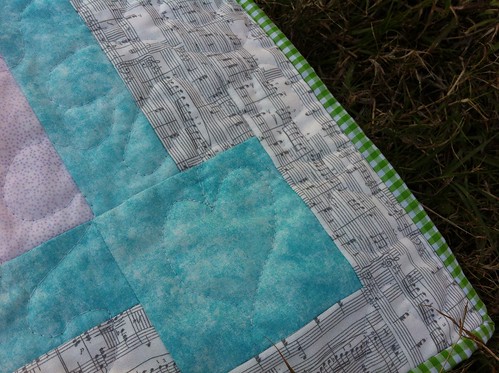
These placemats are quite fun and surprisingly easy to make. I am big on shortcuts, so I tried to make this as easy as possible. They finish at around 12" x 18" because a fancy schmancy designer friend once told me that is the proper size of placemats. 

Fabric Requirements:
  • Background fabric: One WOF 16" strip
  • Vertical stripes: 1/4 yard, cut into four WOF 2" strips
  • Horizontal stripe: 1/4 yard, cut into two WOF 2.5" strips
    • subcut into four 2.5" x 17.5" pieces
  • Backing: 3/4 yard fabric (or pieced scraps)
  • Batting: 1/2 yard of the wide kind (or scraps from other projects)
  • Binding: 1/2 yard of fabric


Okay, let's get started. First off, you are going to take the background strip and keeping it with the selvages folded together, cut about a 4" strip off one cut end. This will leave you with a WOF x 12" strip and a WOF x 4" strip.

Now we need to get one strip of the 2" vertical fabric strips and sandwich it in between the the 12" and 4" background pieces. I pressed this strip towards the background fabric, but you could press this step to either direction.

Next we need to divide this new sandwiched strip into quarters, like this, as if you were cutting along the dotted lines. This means we will now be working on each placemat individually.

Next up is adding the horizontal strip to the placemats. Cut a 2.75" strip off the bottom of each placemat and sandwich the horizontal strips in.

Now we are going to press towards the horizontal strip or else things will be too bulky.

Now it is time to add the remaining two vertical strips. This bouncing back and forth is what gives the appearance of weaving or plaid. With the remaining three WOF strips still folded in half, cut 14" from the selvages. Toss once of the remaining three folded pieces in your scrap bin.

Unfold and flatten the two remaining pieces, and cut them to about 14" pieces as well. This will give you the 8 strips you need to finish the placemats.

At this point, you will cut either 1.25" or 1.5" away from the right and left sides of the first vertical stripe, and sandwich the others in between. *Please note: From this point on, it is important that you keep things in order (or use 4 different pin colors) so that the strip you cut off one placemat goes back on that same placemat, just in case any previous cuts or seam allowances don't meet up.

My original sketch required them to cut at 1.25" away from the central stripe but my hands were moving faster than my brain, so I cut the gap between the middle and right stripes at 1.5" (which resulted in a 1.25" gap between the two) and it didn't look so bad. For contrast, I cut 1.25" away for the left stripe (resulting in a 1" gap). Here are a couple of pictures to show how they each look.

That is 1" of background between the left and middle (because I cut 1.25" away), and 1.25" of background between the middle and right (because I cut 1.5" away). Whichever distance you choose, cut the placemat and sandwich the vertical stripe between the two cut pieces, then repeat for the other stripe. Press into the vertical stripes. At this point, you are going to square up your placemats. They might come out a little large, so you can just make them bigger (I like to leave wiggle room in case something goes disastrously wrong), or trim them to the 12" x 18" standard size.

Now that we have everything squared up, all that remains is the quilting! I decided to add some hand stitching, which is completely optional. Whenever I add hand stitching, I like to not have it show on the backing, so I spray basted the front to the batting and hand stitched, then spray basted on the backing and machine quilted.

To save time, I machine quilted a few decorative lines in between the vertical stripes, and then just used the stitch-in-the-ditch technique. Then you add some binding and presto: You have 4 fun placemats!!

Since I chose linen for my background fabric and didn't do very dense quilting, it looks a little lumpy, but I'm okay with that. If you are not okay with that, make sure you add more straight line quilting or use a dense FMQ design.
Untitled

Side note about seam allowances: I'm awful at keeping exact 1/4" seam allowances, so as long as you keep your seam allowance consistent, you can use whatever works best for you.

22 May 2014

Fence Quilt Finish

I was able to finish my goal for the May round of Lovely Year of Finishes (goal setting post, over here), a barn COOP fence quilt. Originally I wanted to make a barn quilt since I will never be able to make a quilt for my chickens that they would appreciate (and by appreciate I mean not stomp on and cover in feces). Then it occurred to me that we don't have a barn, so I better make a coop quilt. So I got started making a plan. Halfway through the process, it occurred to me that their final chicken coop might not have a convenient place to hang the finished product. Then my boyfriend suggested I hang it on the fence for everyone, chicken and human alike, to enjoy, so the name evolved again.

When I last showed a progress update, I had finished painting the block design and was utterly flummoxed with the sealing phase. I am pleased to announce that after sanding off the spray enamel, I was able to successfully add three coats of satin polycrylic and I could not be happier with the end result. I opted for a satin finish because I didn't want to be blinded by the dang thing whenever harsh South Texas sun was shining, which is basically always, btw.

So this is what I see when I go out the back door and turn left. 
Untitled

This is what the chickens see from the front of their coop. I think everyone has a great view.
Untitled

Here is a closeup shot that really illustrates the colors and the awesomeness that is the satin finish.
Untitled

And since I coudn't get the lighting correct anyways (I told you harsh South Texas sun was ever-present) here is a fun artsy shot. Look at how well those seams match up! ;)
Untitled

The quilt was screwed to the fence just in time for the chickens 14th [week] birthday on Monday! Aww! Here they are celebrating with a nice bouquet of babies breath that grew out of the ground just for them (or so they would like to believe). They celebrated by eating the babies breath.
Untitled

Here are some closeups of my lovely ladies, in no particular order. If you want to read about why they have such odd names, I tried my best to explain it all over here.

First up we have Eglantine (Eggy).
Untitled

Then here comes Bullroarer (BRthur).
Untitled

And lastly we have Polydontosaurus (Polly).
Untitled

Wow! They are growing up so quickly!

20 May 2014

Blogger's Quilt Festival Entry 2

This is my second entry into the 2014 Blogger's Quilt Festival! I am entering this quilt in the "Small Quilt" category because it is 60" x 60" in size. You can go vote over here. This was a baby quilt for a friend's new baby, Eleora.
Untitled

I used a stipple pattern for most of the quilt, since I'm still trying to master that technique. I couldn't resist throwing in a few FMQ hearts. I'm not sure how you are supposed to do this, but this seemed to work.
Untitled

Blogger's Quilt Festival Entry 1


This is my first entry for the Blogger's Quilt Festival! I am entering it into the "Modern Quilts" category. You can go vote over here

This was a donation quilt for Girls Incorporated of San Antonio, a national organization that "Inspires all girls to be strong, smart, and bold." They also offer an amazing summer camp for girls that focuses on STEM subjects. As a woman in the STEM field (I teach astronomy labs and physical science teacher prep classes), this is something I vehemently support! Hence, volunteering to donate a quilt.

Anyways, here is the quilt in question. I'm calling it "Astronomical Twilight." It is 48" x 60" in size, so decent throw/lap quilt sized. The original post about the big finish is over here.
Untitled

And here is a shot of the backing. 
Untitled

Thanks for looking! 

19 May 2014

Swap Finishes and BQF

Late last week I finished up and mailed for both Super Swaps (send right on the deadline, eack!) and Mug Rug Revival (sent well in advance of the deadline). I also have two quilts entered into the Blogger's Quilt Festival. I have links at the end of this post.

I completely forgot to take pictures of the mug rug before it went into the envelope, but I can assure you that it looked identical to this, only with hidden stitches holding the binding in place instead of clips.
Untitled

Then we come to the tote for Super Swaps. I made a modified 241 bag. Modified because I really haven't mastered this pattern yet. The one attempt I tried for myself ended in disaster and was never finished. So I simplified it down a bit, and managed to come up with something I was quite proud of. :)
Untitled


Here is a shot of the lining.
Untitled


And here you can see one of the modifications I made: Using nylon webbing instead of fabric for the straps.
Untitled

Now on to the Blogger's Quilt Festival! Astronomical Twilight is entered into the Modern Quilt category. You can vote here.
Untitled

Then Baby Eleora's quilt is entered into the Small Quilt Category. Voting can be found here.
Untitled

Of course I would love votes for my quilts, but mostly I just want people to see all the amazing inspiring quilts over there! Vote for someone, even if it isn't me!

14 May 2014

WIP Wednesday

Apparently I am trying so hard to relax after submitting my grades that I am rebelling against sewing because not much got worked on this week. I have been staying busy with a ton of non-sewing projects. Here is the nearly completed mug rug for Mug Rug Revival.
Untitled

Here is the exterior of the bag I'm making for Super Swaps. Now to bust a move and finish the interior and add some straps. I want this and the mug rug to be in the mail over the next day or so.
Untitled

This is the progress I have made on my May LFoY goal: A barn chicken-coop quilt for my hens that will now be hung on the fence near the coop. I have finished the design and now just need to seal and hang it. I used spray enamel and it came out horribly so I'm going to add brush-on polycrylic and hope that it can adhere or else I'm sanding it all off and starting again.
Untitled

Speaking of my little ladies (I can no longer call them girls, but they aren't quite women yet), here they are being utterly confused by their first experience with rain. We had to put them in their house when the rain started because they didn't know how to stay dry.
Untitled

Oh my gosh, aren't these just the cutest hens in the world?? From left to right: Polyodontosaurus (Polly for short), Eglentine (Eggy for short), & Bullroarer (BR to my boyfriend, Bea Arthur to me).
Untitled
Maybe I should explain the names. Bullroarer has hilarious feathers growing out of her legs, feet, and toes which reminded me of a hobbit. She has always been the biggest hen, so that seemed like a good fit even though the actual hobbit named Bullroarer was a male.

Then we were trying to find another hobbity name for the one on the left. We had already been calling her "Polly" though since she has an extra toe (genetic trail of extra toes is called polydactyly) but there were no hobbit names that started with "Polly" so naturally we started searching through dinosaur genera and found Polyodontosaurus grandis, a small, bird-like dinosaur. Perfect!

Then we come to the middle hen. Eglantine was another distant hobbit name, but it also happens to be the name of Angela Lansbury's character in Bedknobs & Broomsticks aka my favorite movie ever. Doesn't she even look a little like Angela Lansbury?? It can also be shortened to "Eggy" which is kind of the best chicken name ever. I'm always singing this song to her though my rendition is a little less dancey.


Oh yeah! Back to projects! I'm also refinishing my sewing chair. This has been my chair since I was about 6 years old, which means it had all kinds of stickers, nail polish, and strange carvings on the surface. I have sanded and primed it, now I'm just trying to add enough coats of this dark grey so that it stops looking blue.
Untitled

Then we come to cooking! All recipes we used are linked. My boyfriend, cousin, and I successfully made a souffle following a Julia Child recipe. Check out the puffiness!
Untitled

This was a makeshift breakfast my boyfriend and I put together. The kale and potatoes were leftover from other meals, so we just scrambled eggs with corned beef. Omnomnom!
Untitled

Then we have salisbury steak, mashed potatoes, and roasted cabbage. The salisbury steak and mashed potatoes were incredible, but the cabbage wasn't, which is bizarre because I absolutely LOVE cabbage. I think I would have liked it more cut smaller because this was difficult to eat. I also might have preferred the taste of the cabbage raw with the same marinade, which I altered and used sesame oil instead of olive oil because sesame oil and cabbage reminds me of Japan.
Untitled

06 May 2014

May LYOF Goal

My goal this month is [not-so] simple. It is something I have never done before. Well, not exactly. I'm going to paint a barn quilt for my chicken coop. That would make it a coop quilt, huh? Oh well. Whatever you call it, I'm going to paint it because I can't spend my life waiting for a barn that might never happen! 

Here is a rough approximation of the color palette I am going for. It is based on one of my favorite outfits. I have a dress in the coral color that is a bit too low cut to wear for teaching. To get around this it gets layered with sports bras. The two sports bras I find myself wanting to couple it with are purple and teal, so bam! Color palette!  


This is the design I have more or less settled on (though don't ask which color will be which!). I think it would make the chickens happy. Side note, chickens can actually see in color, so it is very important to make sure the colors are arranged in a pleasing design. This is a submissions for the Accuquilt contest by Mary Kay Davis. 


So far I have purchased a "2 foot x 2 foot" piece of plywood, taken that back because it was actually 23 and 7/8" x 23 and 7/8", bought a 3' by 3' piece of plywood, picked/purchased paint, used wood filler to fix the knots, sanded it smooth, and painted the background grey color. Here is my blank canvas.


And here it is with the grey background. 


Now that the grey has dried I'm working on marking and taping up the design so I can paint the colors one by one. To finish this on time each color has about a week to get painted, and that will still leave a chunk of time for touchups and/or unforeseen delays (like end of semester grading, and two back-to-back weekends of different friends staying with us).

01 May 2014

Deviled Eggs Recipe

I love deviled eggs partly because they are delicious and partly because they are so simple to make. My boyfriend didn't know they were easy to make and would always get really excited when we were at an event that had them. Then I told him they were easy to make and now we have made them twice in one week.

I used to make my deviled eggs with zesty sauce from Burger King, but that actually requires eating fast food, so I had to revamp my recipe which took years to perfect, so I decided to share it. This is what I came up with (recipe is after the pictures).

First off, you need eggs. This is for 12 deviled eggs (or 6 whole eggs). I like to set my eggs aside for at least a week before I boil them because this helps them to be a little easier to peel.

For spices, I used cayenne, dill, paprika, ground mustard, salt, and pepper.

As my wet ingredients I used mayo, horseradish (this is what the zesty sauce from BK added), and pickle juice.

Mix all that goodness up! Mmm, it already looks tasty.

Make sure you don't forget to actually boil your eggs. I put baking soda in the water to help the eggs peel. That black blob is my color-changing boiled egg timer. 

Once the eggs are hard boiled, I put them immediately in a water bath. Supposedly this also helps to assist in peeling, but mostly it just speeds up the process of getting deviled eggs in my tummy.

Then you peel the eggs and slice those suckers in half! Thanks for the help, boyfriend.

Now we need to scoop the yolks into the saucy mixture. Set the whites aside because we will use them later.

Then you mix that all up! I'm okay with it being a little lumpy, but if you aren't, just keep mixing until you are satisfied.

Once you have it mixed to your liking, divide it up into the leftover egg whites.

Now you sprinkle with a little paprika to garnish and then try your hardest to not immediately eat all the eggs. Or you can totally eat all the eggs. That's what being an adult is all about, right? If you are planning on storing the eggs in the fridge, you might want to get an egg tray that seals. We wrapped this one in foil and egg got smeared all over the foil. Once we find a sealing one, this will be designated as the party egg tray, not the egg storage tray.

Deviled Eggs
  • 1 teaspoon baking soda
  • 6 eggs
  • water to cover eggs
  • 1/4 cup mayonaise
  • 1.5 teaspoon horseradish (can omit if you don't like it)
  • 1 tablespoon pickle juice
  • scant 1/8 teaspoon salt
  • 1/8 teaspoon pepper
  • 1/2 teaspoon paprika + more for garnish
  • 3/4 teaspoon ground mustard
  • 1 teaspoon dill
  • scant 1/8 teaspoon cayenne (can omit/reduce/increase based on your taste)
Mix baking soda in water. Hard boil eggs.
Cut eggs in half and scoop yolks into bowl. Set whites aside for later.
Combine all remaining ingredients into bowl with egg yolks.
Scoop into egg whites and garnish with paprika. 
Enjoy!