27 February 2014

Plenty to do

This month for LYoF, I am going to divide my attention between two main goals. First off we have my Pantone challenge quilt. This is my fabric haul for it. The two left fabrics are solids and the second from the right is a shot cotton. I have never used shot cotton before and I am loving it! I have a design and everything is cut. Stay tuned for progress!
Untitled

My other main goal for the month is to finish up my bag for the Secret Tote Bag Swap. (Is it cheating is both of these HAVE to be done this month?) This is the main panel I have come up with. It is now trimmed and on its was towards becoming a bag.
Partner: If this giant panel turned into a tote, would you be able to love it? The lighting is a little off.

While I was working on the boxed corners for the tote last weekend I broke not one...
Uh oh.

But TWO needles! Dang. This second one was even a brand new denim needle! There are just so many layers in this bag. I might have been a tad overzealous in my plan. Oh well. With a third needle I was able to get the corners done!
Aaaand I broke another needle. This tote bag is going to be the death of me!

I also served as a pattern tester for TartanKiwi and came up with this lovely badger (pattern is now available for free over here). I named her Constance after the badger in the Redwall books. She is going to be the focal block in a tote bag for a friend of mine who is ironically named Constance. (She goes by Connie and would kill me if she knew I just called her by her birth name!)
Badger

In an exciting twist of fate, I actually won something! Something gorgeous! I won all this fabric from Cuts of Cotton! I have no idea what to do with it.
Untitled

Then of course we have the chickens. They are thriving. Here they are at 11 days old, learning the joys of napping in laps.
At 11 days old they have learned the joy of napping in someone's lap. I'm hoping to master napping someday.

Two weeks old.
Two weeks old!

 Now 18 days old and huge!
18 days old

23 February 2014

Quilted Cedar Chest Finish

A few years ago, my mom bought be an old cedar chest (Virginia Maid by Lane) because I had been wanting one and she refused to part with hers. It had good bones, but was basically hideous. I didn't actually take any pictures of MY cedar chest, but found these of the same model. The first one shows the same wood finish as mine with a clean upholstery cover while the second one shows a different [lighter] wood finish than mine but with upholstery closer to the disgusting condition mine came in.

I immediately knew that the cover had to be changed. Being a quilter, I had this secret yearning to piece and quilt the cover. The original was just stapled to a piece of particleboard with a thin layer of fluff between them. This cedar chest was going to double as living room seating, so it needed a little more cushion. I went with 3" furniture foam. 

Apparently I'm super picky because the original knobs on the chest were deemed too lame to live (not to mention filthy!) and had to go. See?

Last summer while in Ireland with my boyfriend and cousin, we found a store called Knobs and Knockers that sold... Knobs and knockers! I was able to find a tremendously better option! Aren't they gorgeous?? Yes, my main souvenir from the trip was a bag of drawer pulls. 
Untitled

Now I should stop blabbing and get to the good stuff. Here is a view of the FMQ on the cushion. The cushion itself is held onto the chest with industrial strength velcro.
Untitled

The cover was made out of one solid piece that had a seam up the middle of the back [well most of it. I had to leave some unstitched to turn it right-side out], then the sides were sewn up and the corners were boxed to 3" to fit the foam. Then the foam was stuffed back in and the gap in the bottom that was left unstitched for turning was closed with skinny velcro.
Untitled

And here are some overall shots of the whole thing!
Untitled

Some of the detail on the back edge gets lost behind the foam, but having a comfortable place to sit was vastly more important to me.
Untitled

Now I'm aware that some furniture restoration experts would say I messed up by not refinishing the surface, but I don't care. I took something practical but [in my humble opinion] hideous and gave it new life! Plus, now it is pretty and way more comfortable to sit on!

Hard to believe I finished this in time for February's Lovely Year of Finishes. Woot! Here are the milestone links in the process of finishing this beauty!

"Quilt" front done (LYOF link-up)

18 February 2014

Quilting and Chicks

I finished the quilting on the houndstooth "quilt" which means all I have to do is assemble the "quilt" into a cushion cover and it will be done in time! The easy way would be to staple the quilt to the bottom of a board and screw that into the chest. That is how the original cushion was attached. I want to actually make a pillow case for the foam. I'm thinking boxed corners. We'll see.
Untitled

I also finished up the baby quilt for my BFF's new baby girl. I was working on another front because this one seemed too babyish, but I went with it. This front was originally made as a sort of challenge.
Untitled

I used a stipple pattern for most of the quilt, since I'm still trying to master that technique. I couldn't resist throwing in a few FMQ hearts. I'm not sure how you are supposed to do this, but this seemed to work.
Untitled

I also finished the Valentines gift for my boyfriend. We went to Great American Beer Festival in 2012 where he got this shirt. Sadly it ended up with a greasy stain that wouldn't go away. He loved the shirt but didn't want to wear it stained. So I made him a reusable tote bag out of it. The other fabric is all leftover from the quilt I made him last year.
Untitled

Then we come to my most important WIP: Baby chicks! We received them from the hatchery at 3 days old. Cute little fluffballs! There are 15: I am keeping 2-3, my cousin is keeping 6-7, and we are selling the rest.
Three days old!

Here they are taking a nap at 4 days old.
Four days old--Everyone is napping!

At five days old, they were all starting to get big girl feathers.
Day 5- Starting to get big girl feathers!

At day 6, we gave them pine shavings to dig in and a big rock to play on.
Day 6- Enriched habitat with pine shavings to dig in and a rock to conquer!

At one week old, they are all starting to master perching!
One week old--They can perch!

I goofed and only took GoPro footage on day 8, so you have to settle for a shot of them today, at 9 days old. They are getting huge and very fast [as you can tell by the chick that is no more than a blur!].
Untitled

07 February 2014

Four Weeks

Woohooo! I only have 4 weeks left until Spring Break. Teaching this semester is going really well as I am lucky enough to have some amazing students, but I'm just sleepy.

I have managed to get some sewing done this week!

Here we have some FMQ on the houndstooth "quilt". I ran out of thread so this won't be touched again for a while. I'm still shooting for having this done in time for A Lovely Year of Finishes: February edition!

I also finished a purse! I followed this pattern.

Here is a fabric shot so you can see all the goodness! Cuckoo clocks, wood grain, sketch, and mustaches: Oh my!

Last weekend, the boyfriend and I whipped up some seared tuna with coconut rice and veggies and had plenty leftover for lunches.


Speaking of lunches, I made another silverware roll-up/mitered corner napkin since my teaching schedule keeps me out of the house during lunch and dinner. I love taking my lunch but I especially love having adorable napkins and silverware pouches to cheer me up.

As it turns out, blackberries were on sale so naturally I bought a bunch and made some jam. Three are plain blackberry, three are basil/blackberry that tastes like plain blackberry. Next time there will be more basil. In the left background of the photo you can see my sprout garden! Om nom nom, sprouts on EVERYTHING! For a few days we couldn't eat them fast enough to keep up with their growth.

01 February 2014

Nosebleed

On Wednesday I had every intention of buckling down and getting a bunch of prep work done for all the classes I'm teaching and then going to the gym. ...Then I got a headache. After a while of that, it turned into a nosebleed that just would not quit. That made me realize that I would get no work done during my 6 hour break between classes, so I drove home pinching my nose and finally got it to stop after a while at home. I still had a bit of a headache, so work and working out seemed out of the question. That of course left napping or sewing but I'm an insomniac so if I took a nap during the day there would be no chance of sleeping at night. Logically I chose sewing!

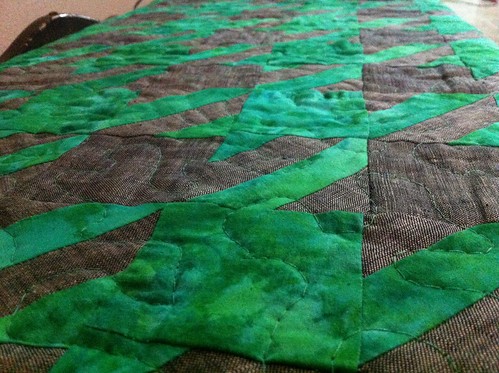
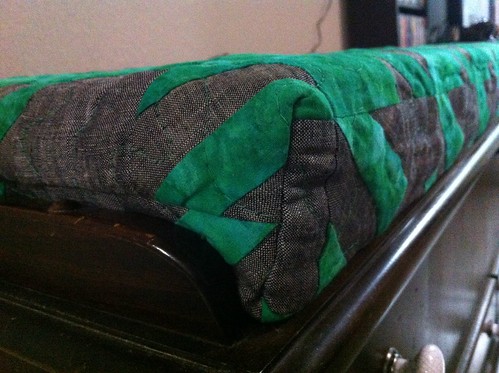
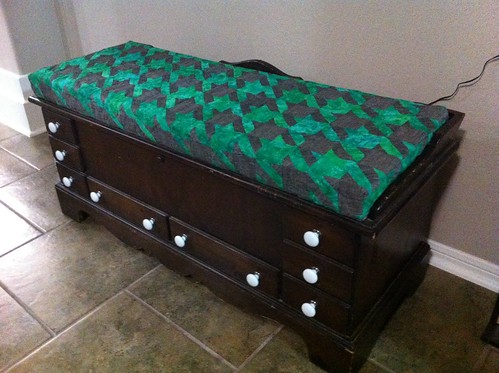
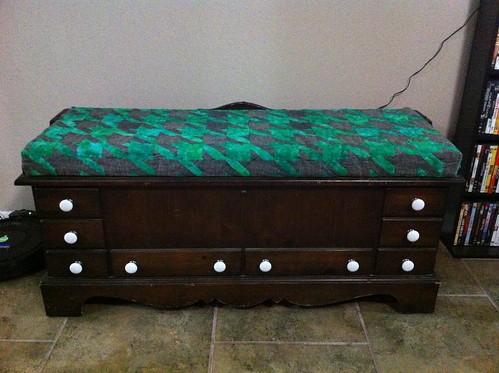
I finished basting the houndstooth "quilt."(FYI, it is a "quilt" and not a quilt because it will be the upholstered cover of the cushion on my cedar chest.) This might just end up being my Lovely Year of Finishes goal for February.

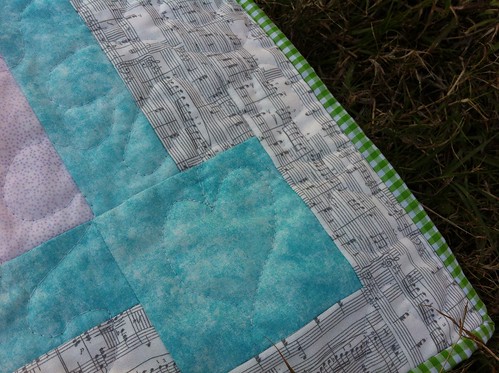
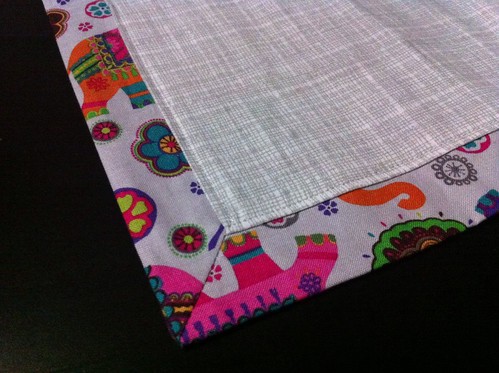
I also successfully made my first mitered corner/self binding napkin! I have tried to do this several times and it always comes out as a horribly lumpy mess that doesn't look squared up at all. Maybe my heart wasn't in it before because this time I read through many [10+, so not joking!] tutorials and fiddled with 3 attempts out of cheapo fabric before I could do anything that even remotely made me consider trying it with nicer fabric. It still isn't perfect, but if I make a few more, it might very well get better! Here is the best corner of the four.


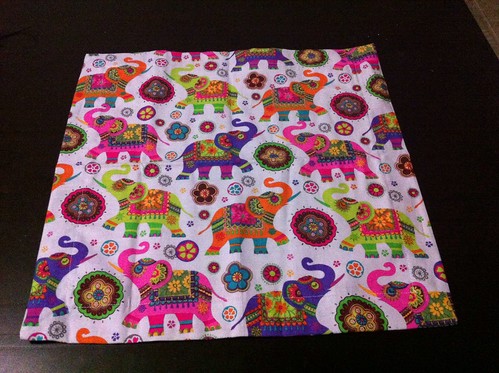
And here is the backing/binding fabric. It is roughly a 14" square, which means I started with a 12" front square and a 16" backing/binding square.


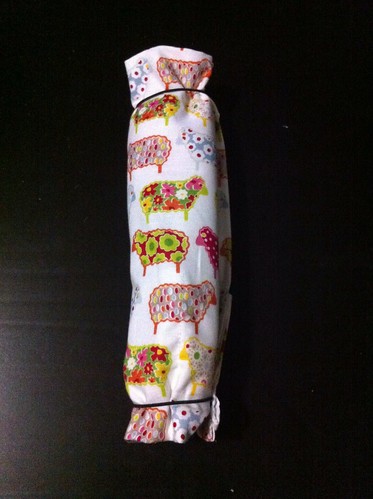
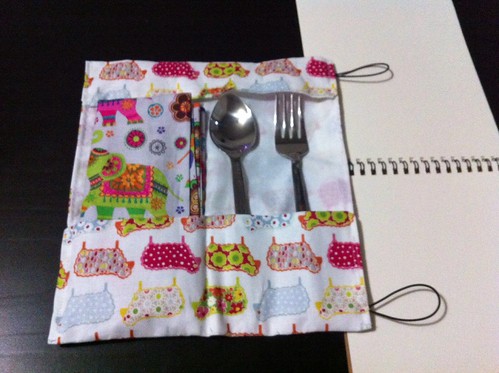
The napkin was needed to complete my little lunch silverware rollup thingamajig since I love to take my lunch. Here it is all rolled up and adorable. Oh gosh, I love these lambs.


This is what it looks like from the inside with rip stop nylon for the lining. I need to whip up a few more of these since they are machine washable and will get thrown in the laundry upon my return home every day. Here's hoping the lambs and elephants get along!

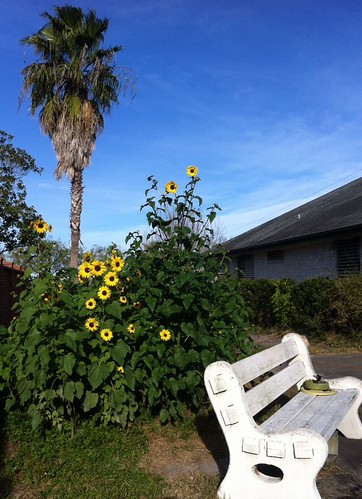
On a completely unrelated note, it would appear that winter is officially here in South Texas since it *almost* froze last night!  Despite the frigid weather facing us, this was a view from my backyard this week. I am very proud of my sunflowers. They just get bigger and better every year, though this is the first year they have decided to pop up again in winter.  Luckily it is cold or else I would be outside not getting anything done.

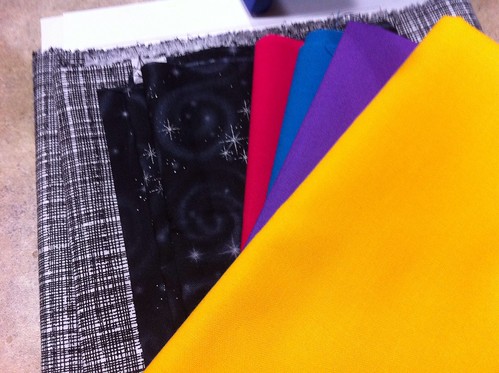
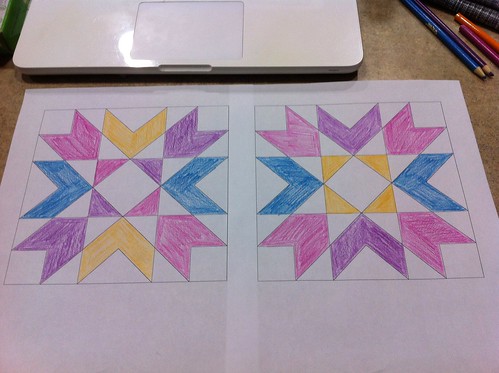
EDIT: Please help! I am making a baby quilt for my bff's brand new daughter and I need some input on which color layout to choose. Here is the fabric (crosshatch for background and black for binding) followed by the two possible layouts. Which do you prefer: Left or right? 


Thank you so much for your feedback!